
Collecting paper signatures is a major hassle. Getting all parties together to sign can take days, wasting valuable time and resources.
Electronic signatures, or eSignatures, are revolutionizing the way we work. They are fast, secure, and legally binding, and they allow you to collect signatures in just minutes. In our current fast-paced and cloud-based business environment, eSignatures are an invaluable tool.
We’ve recently revamped Constellation1 eSign, our integrated eSignature solution, giving it an updated and more intuitive interface and even more powerful signature features. Best of all, it fits seamlessly into Constellation1 document and transaction management workflows, so you have everything you need for a smooth user experience.
Don’t use Constellation1 to manage your documents or transactions? No problem! Our solution works for all industries and can be accessed from anywhere. Having your clients sign documents has never been easier. Let’s walk you through a typical signing session to show you just how easy it is.
- Upload your document
Adding documents is easy. Browse your computer for the file you need, drag and drop from your computer, or add them using the built-in links to common cloud storage platforms like Dropbox. Constellation1 eSign supports the most frequently used file types.

- Add signers
The signer fields auto-populate as you type to quickly add contacts from your address book, which you can easily import into Constellation1 eSign. You can also add new contacts manually as needed. Toggle whether you are also signing the document and set the signing order, if applicable.

- Set up advanced signer options
Constellation1 eSign features multiple advanced signature options. These include two-factor authentication, which you can set to use a predetermined PIN or text message code, with a paid option for knowledge-based authentication. You can also lock signer names or give them the ability to modify their names and configure settings for in-person signing sessions on a phone or tablet.

- Name your session and your transaction
Once you’ve configured your signing session, you can name it or add it to an existing session, then name the transaction. For example, your session might be Smith Purchase – 123 Main Street with different transactions for all the different documents that need to be signed. You can add as many transactions to each session as you need, keeping everything organized and in one place. You can also use this step to write a customized message to signers.

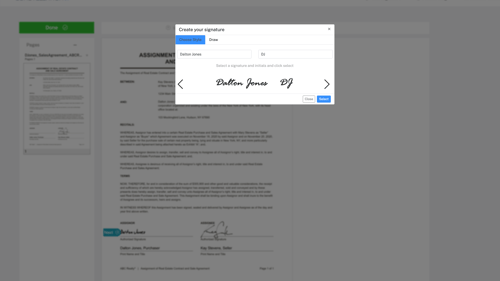
- Set document fields
Constellation1 eSign features a comprehensive library of signature and information fields to ensure signers provide all the information you need. Simply drag and drop fields as required from the field menu. All fields are color-coded by signer for easy placement and reading. You can make fields optional, required, or conditional on another action, like initialing a page, checking a box, or another signature. Customize date and time formats and use our intuitive markup tools to add or strike out document text.
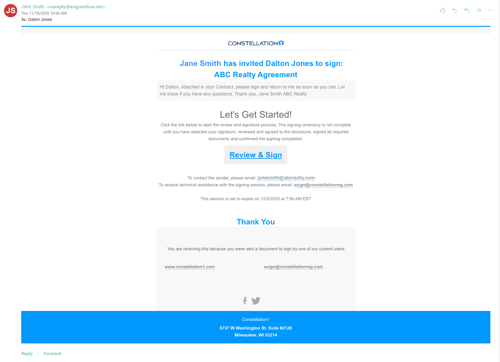
- Send
Almost done! Once you hit send, your signers receive a notification in seconds. That’s it! You’ll be amazed how quickly and easily your document is signed and ready.
ESignatures have revolutionized the way we do business, and in our new global and physically distanced landscape, they are a major asset. Even after the business world find a “new normal,” eSignatures are here to stay.
Are you ready to explore eSignatures for your business? Get in touch with us today.

![]()